How to set up Virgin broadband
Whether you’re a new customer setting up equipment for the first time or you need to replace a Hub, Follow our step-by-step guide to get set up in no time.
In this article
Installing Virgin Media broadband for the first time
Follow our step-by-step guide to get the new Hub set up in no time.
You should have everything you need to get set up in your QuickStart kit. Also, remember our cardboard packaging is fully recyclable, so pop it with your other paper waste once you’re done.
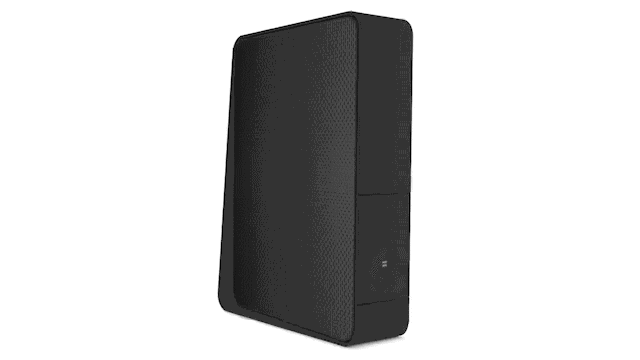
Make sure to keep the Hub out in the open. Objects can block and slow WiFi. Signals from baby monitors, fish tanks and cordless phones can also interfere with WiFi signals. Aim for 1 metre of clearance.
Setting up the Hub in the best position will mean that you’ll get a constant WiFi signal strength in your home.
Handy tip
Keep the Hub upright on a hard surface, with its lights facing into the room. That way your Hub’s strongest WiFi signal goes outwards – not into the floor

Screw the white cable with the black tab firmly in the Hub. Next, connect the power cable with the blue tab.
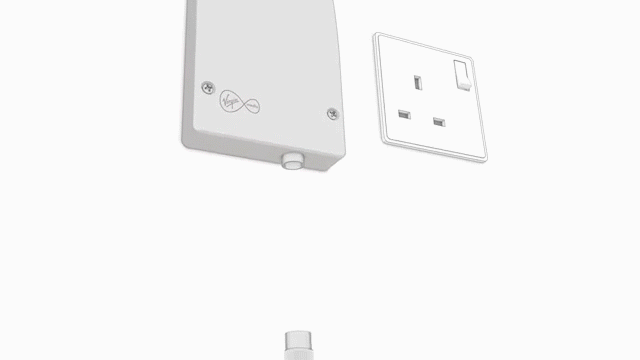
Now push the red label end of the white cable into the wall socket.
Does your wall socket look different?
Your wall socket may have a plug attached to it. Make sure it’s plugged in and turned on at the wall.

It’s time to turn the Hub on! Pop the power cable into a nearby socket and switch it on. Make sure the Hub is switched on at the back.
As the Hub starts up, it'll need to connect to our Fibre network, which might take a while. So sit back and make a cuppa while it does its thing.
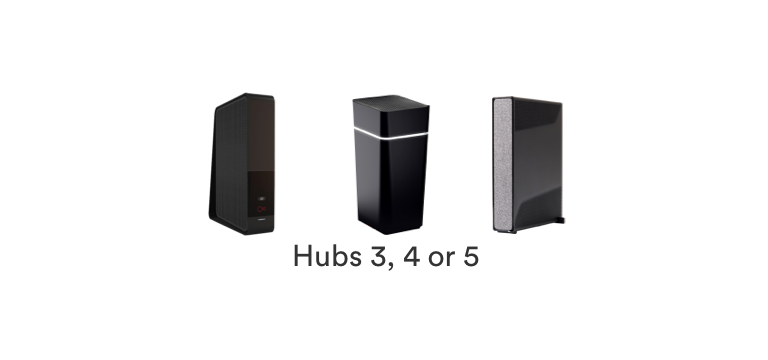
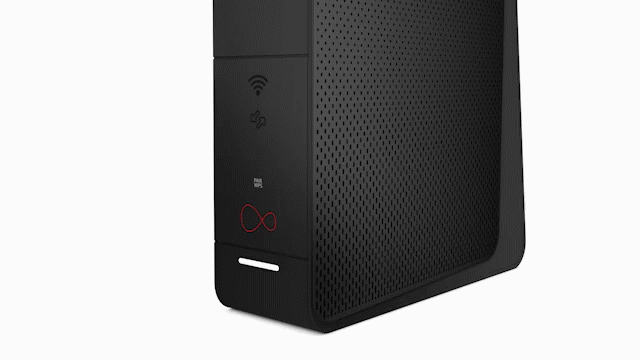
You'll know it's ready when the light is steady and white. If you are using a Hub 4 or Hub 5 the location of the lights will be slightly different. Find out more about Virgin Media Hub Lights.
You’ll find the WiFi name and password on the bottom of the Hub. Use these to connect your devices to the Hub’s WiFi.
Handy tip
Now you’re connected, you might want to download our My Virgin Media app to get the most out of your WiFi.
Replace an existing Virgin Media Hub
It’s important to get everything set up in the right order.
Once the new Hub arrives, please plug it in within 5 days. After 5 days, your old Hub will stop working and you won’t be able to use your broadband until you plug in the new Hub.
So, follow these steps on how to disconnect, return and connect the new Hub.
Switch the power off at the socket where the old Hub’s plugged in and unplug the power cable – keep these together.
Unplug the white connector cable and all other cables from the back of the Hub – make sure you don’t unplug the other end.
If it’s a little tough, use the spanner in the new QuickStart kit.
If you had a CollectPlus letter with your old kit, just follow the instructions on how to return it.
If you didn’t, we don’t need the kit back – but you can recycle it.
Push the white cable (from the old Hub) into the back of the new Hub.
If you had an Ethernet cable and/or a phone cable previously connected, plug those in too.
Connect the Hub’s new power cable with the blue label to the back of the Hub, and plug the other end into a wall socket.
Switch on the plug socket and make sure the Hub is switched on at the back.
As the Hub starts up, it will need to install the latest software, so leave it for about 30 minutes. The light is steady and white when it’s done. If you are using a Hub 4 or Hub 5 the location of the lights will be slightly different. Find out more about Virgin Media Hub Lights.
Like the old hub, you’ll find the WiFi name and password on the bottom.
My Virgin Media Hub isn't working
Take a look at Troubleshooting the Virgin Media Hub for help.
If you’re still having issues, call the number in your QuickStart pack.
Installing Virgin Media broadband, TV and Phone
This should take up to 1 hour 15 minutes. And before getting started, don't plug in or turn on kit until it’s time.
The Hub's fan is underneath, so make sure you install it upright on a hard surface to keep it cool. Then, choose a place that's within reach of your Virgin Media wall socket – and out in the open, away from other cordless gadgets.
Make sure to keep the Hub out in the open – objects can block and slow WiFi. Signals from baby monitors, fish tanks and cordless phones can also interfere with WiFi signals. So, aim for 1 metre of clearance.
Setting up the Hub in the best position will mean that you’ll get a constant WiFi signal strength in your home.
Keep the Hub upright on a hard surface, with its lights facing into the room. That way your Hub’s strongest WiFi signal goes outwards – not into the floor.

Get the Hub ready by connecting the wires. First, screw the white cable with the blue tab in the Hub, and then plug in either end of the yellow Ethernet cable. Connect the Hub’s power cable with the blue tab.
Don’t plug the power cable into a plug socket yet.

Connect one end of the ethernet cable to the back of your box. Use the HDMI cable provided to connect your box to the TV.
Finally, connect the power supply for your box.
Take a note of the name of the HDMI port that you connected to. For example, HDMI 1.

Push the white isolator cable, with the black band, into the slot in the splitter marked ‘Wall’. Take the red-banded end of the isolator cable, and plug it firmly into the Virgin Media socket on your wall.
If there’s already a cable plugged into your Virgin Media wall socket, use the spanner supplied in the box, to remove it.
Pop the power cable into a nearby socket and switch it on. Make sure the Hub is switched on at the back. As the Hub starts up, it'll need to connect to the Virgin Media Fibre network, which might take a while.
You'll know it's ready when the base light is steady and white. If you are using a Hub 4 or Hub 5 the location of the lights will be slightly different. Find out more about Virgin Media Hub Lights.

Now that the Hub is up and running, it’s time to turn the Box on.
Pop the power cable into a nearby plug socket and make sure the socket’s turned on.
It takes around 30 minutes to start up, as it connects for the first time.
If you’ve a Virgin TV 360, you’ll need to reply to the SMS that we sent to you with the word 'GO'. This will activate your services.

Use your own TV remote to turn on your TV – pressing the Input, AV or Source button.
Select the correct HDMI input for your box. When you see the ‘Starting Up’ screen, you can pull the tab out of the remote. Then follow the instructions on screen to finish your set up.
How to configure advanced settings on the Hub
In this section, you’ll be able to get help on how to access your WiFi settings from your browser. Once you’ve logged into the settings page you’ll also be able to configure your WiFi name (SSID), change your WiFi password, run diagnostic tests on the Hub – and setup or modify your Guest network settings.
Enter 192.168.0.1 into the address bar of your browser, the settings page will then load. If you’ve enabled Modem Mode on the Hub you’ll need to use 192.168.100.1 instead.
When prompted, enter the settings password shown on the bottom of the Hub/Super Hub.
Once you’ve accessed the page, there are a variety of settings you can change:
Select Advanced settings on the left-hand side.
Select Wireless.
Select Security.
You’ll then be able to change your WiFi network names and password.Select Apply changes to save.
There are more settings you can change from the menus on the left.
Wireless Network Settings You can change your WiFi security settings, to disable broadcasting your WiFi network name, and even to disable WiFi altogether.
Super Hub Settings You can change the password for accessing this page.
Device Connection Status You can view details on the Super Hub's current status, along with details about any devices that are connected to the Super Hub.